
How to make Videos (Pre GoPro and Youtube)
HA HA - This page is pretty much a historical document at this point. I currently use a couple of GoPro Hero 8s, a gimbal and a drone. I'm leaving most of this page as is for now. I will be a new page for just do up a YouTube video on my current way of doing things which is not that much different than the rest of the GoPro community. MY CHANNEL
Making videos is quite a bit of fun. It is a great way to show your NON-MTB family and friends what you are so into. It is also great for explaining how you came to have the latest boo boo. Additionally, sooner or later you and your friends are going to crash while the camera is rolling which is always good for some laughs.
I first started this page back in "The Day" when video taping your MTB rides was a much harder deal. The Go Pro Cameras have shifted the landscape for MTB videos offering super compact cameras that produce quality video. Additionally online video hosting sites like Vimeo and YouTube have gotten much better in the quality department compared to what was offered 10 years ago. There are so many permutations of how to do things, my current advice would be to Google your your camera and video tutorial and you will have a plethora of material to dig through. I'm really keeping this page on the site for my historical purposes.
This How-To should give the basics needed to save those precious moments so you can laugh at yourself and torment your riding buddies for many years to come. I would be remiss if I did not point out that Pete Fagerlin was on one of the first folks to do the Helmet Camera thing on a Mountain Bike and he has one of the best Mountain Bike Video making how to I have found. While not trying to rip off his work, when you have the optimal way to do things already figured out it is going to be emulated.
So with all that said, here is the How-To Part
| 1. | Build a helmet camera of some sort. There are many ways to do this but the two main ways are: | ||||||||||
|
|||||||||||
| 2. | Go ride, have fun and shoot some video. | ||||||||||
| 3. | Get the video into your computer. | ||||||||||
| 4. | Edit the video. | ||||||||||
| 5. | Publish your video in some format that other people can views. |
There are two main ways to do the helmet camera thing. You can either do the the Lipstick Camera method or the Helmet-Mounted Camcorder method. The Lipstick Camera method is probably the most popular method.
Lipstick Camera
method
 |
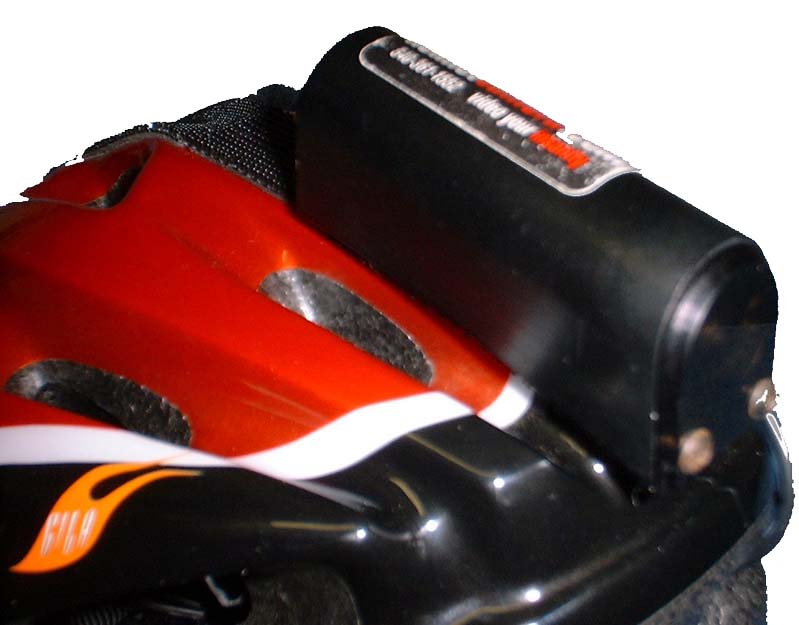
I bought a lipstick camera, microphone, and protective enclosure from www.helmetcamera.com. I would have bought their complete kit but I already had a suitable battery and charger. Although the protective housing is not required, I really like it because it has a tinted faceplate on the front that helps cut down glare and it makes wiping off trail dust a snap. The lipstick camera slides into the housing and its secured in place using a set screw. |
| The lipstick camera housing is held to my helmet using an industrial version of Velcro on steroids. In the picture to the right there are two strips on my helmet. One is used when the camera is pointed forward and the other is used when I have the camera looking behind me. |
 |
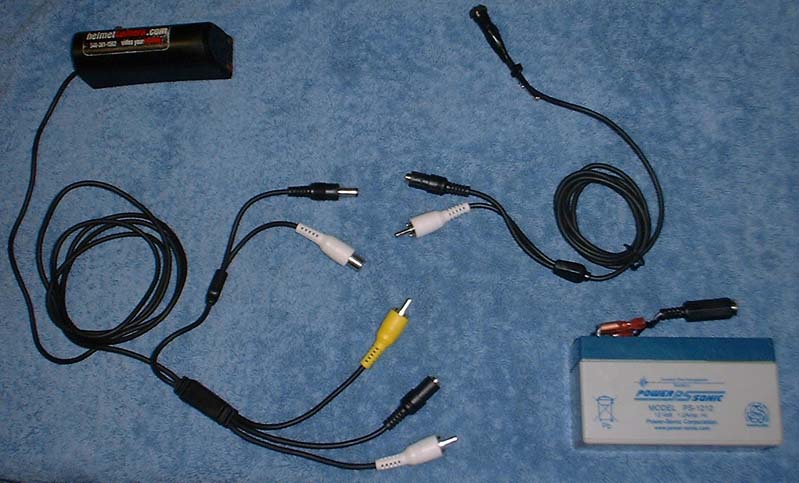 |
The lipstick camera and microphone are powered by a 12V rechargeable battery that gets stashed in the bottom my pack. I used a sealed lead acid battery which was dirt cheap but it was a little on the heavy side. But on the up side it would run the camera for more hours than I could carry tape. A bank of 8 NiMH batteries would have been lighter but the run time would have been shorter, but probably adequate. |
| My budget for a video camera was really tight so I did a bunch of research on older 8MM camcorders that had A/V inputs. Then I watched eBay like a hawk for one of the cameras on my list and eventually won a bid on a camcorder that had broken optics but the VCR portion still worked fine. I managed to get the camcorder, charger, battery, AC adaptor and carry case for a mere $80! Although the camera is fairly small and lightweight it can drag on you on really long climbs. |
 |
|
For something a little out you could tryout "Toe Jam Cam" |
||
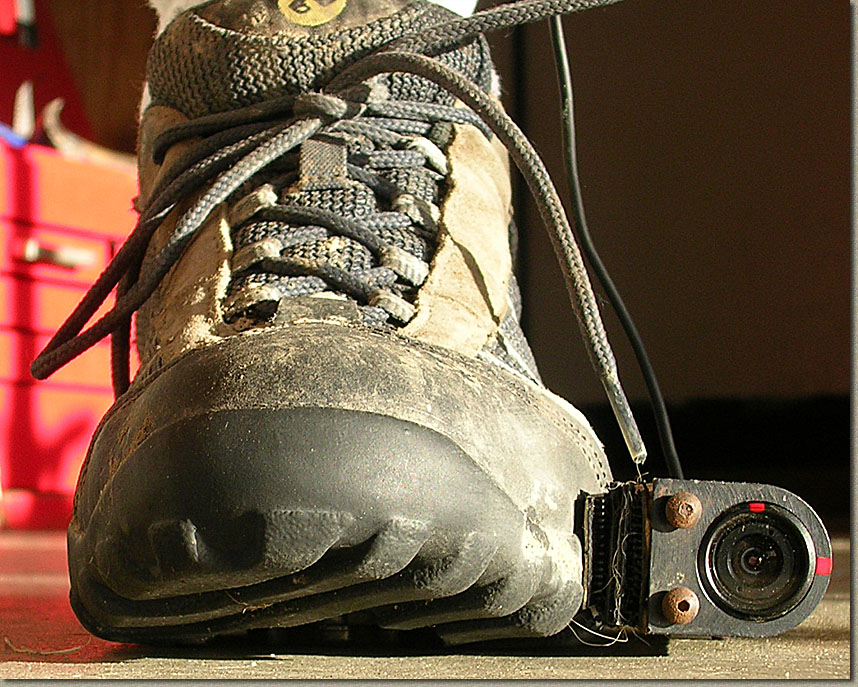 |
So after I switched to the Helmet-Mounted Camcorder Method, I was left with a lipstick camera just gathering dust. So I slapped some industrial strength Velcro on the forward outside part of my left shoe and another strip on the outside heel area of my right shoe. I had to reorient the camera in the housing, but by going with the left foot looking forward and the right foot looking rearward setup I did not have to mess with the orientation of the camera with wanted to switch angles. | |
| Now the "Toe Jam Cam" gives some pretty disorientating footage when you are pedaling but you can get some interesting angles when you are coasting. You can see some of these in my Gooseberry Video. Cable routing can be interesting as a loose cable in that area could get caught on brush or your pedals if not properly thought out. I routed the cables under my knee warmers and shorts on their way to the camcorder in my backpack. You can also mount camera in all sorts of locations on your bike, but I am not a fan of having cables attaching me to my bike. |
 |
|
Helmet-Mounted Camcorder Method
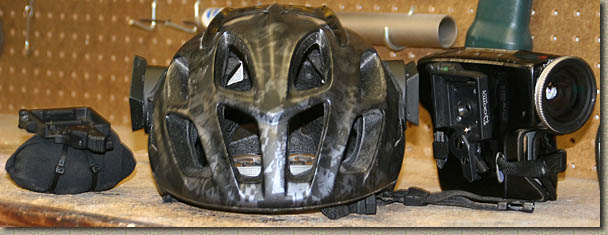
The Helmet-Mounted Camera method is just that, a camcorder strapped to your helmet. You will need a smallish camcorder. I have a Sony DCR-PC-9, but I almost bought one of the Canon ZR line of miniDV camcorders. To get the camcorder on my helmet I bought an "X-Jacket" enclosure from ThinkHelmets, but they can also be purchased through Sky Systems LTD. (I believe these are at least affiliated companies, if not one and the same). I almost purchased an enclosure from Bonehead Composites but ultimately I liked the look of the X-jacket better.
 |
When the mount came in it was like an early Christmas present |
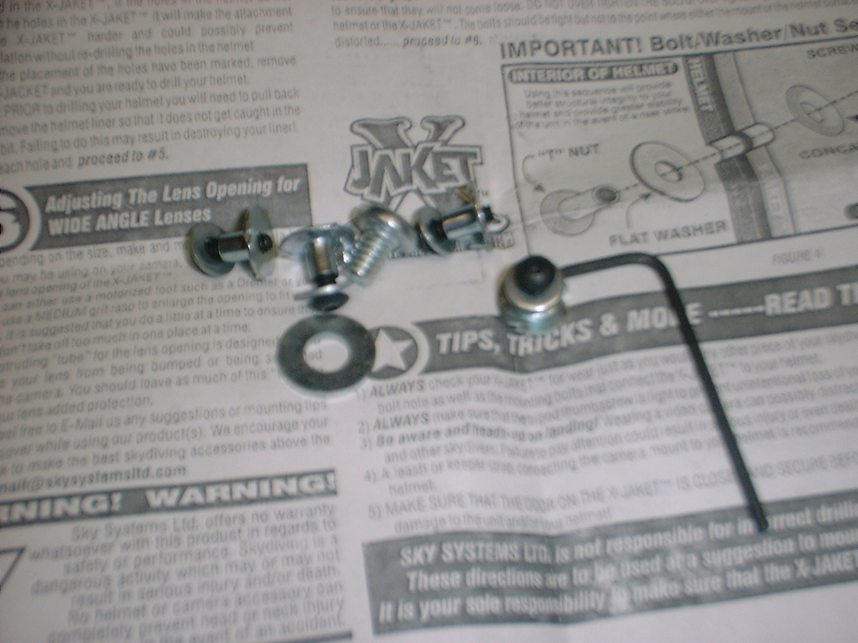 |
It came with some mounting hardware, but it was designed around the flat mounting surfaces of your typical skydiving helmet. | |
 |
There was also some blah blah warning about using these things. |
 |
I fixed the warning quite quickly | |
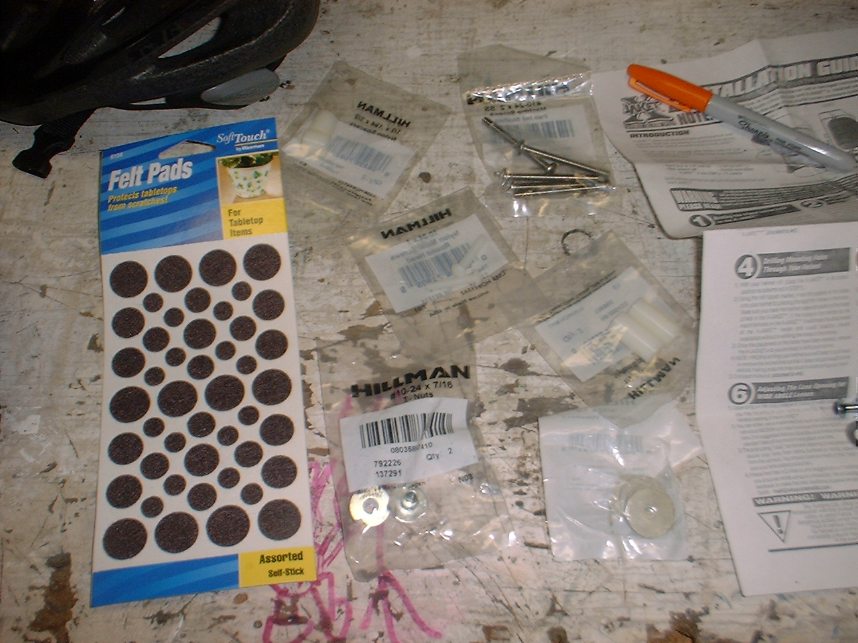 |
I had assembled my own little collection of mounting hardware from the local home improvement store. |
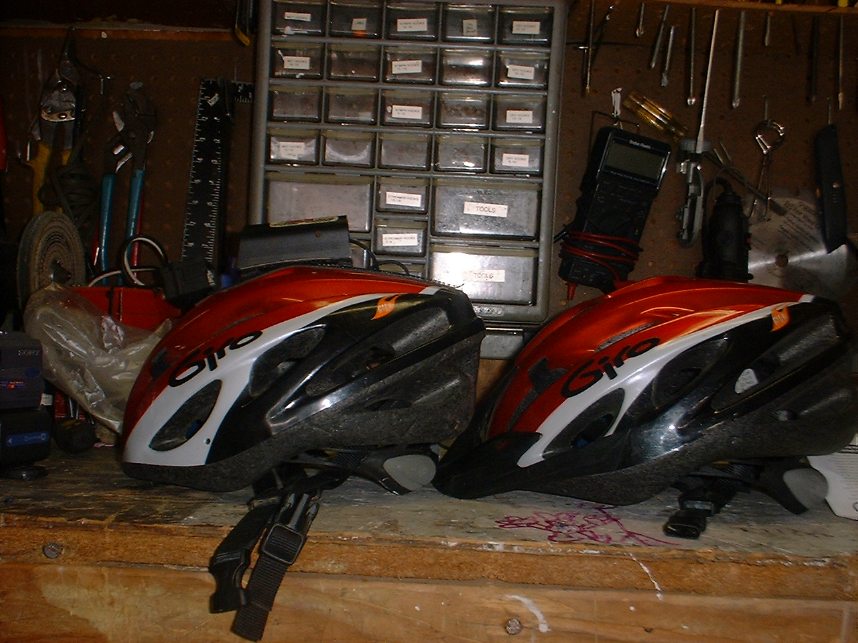 |
I used my other helmet which I already had the point of view figured out on as the guide for the mounting angle of the enclosure. | |
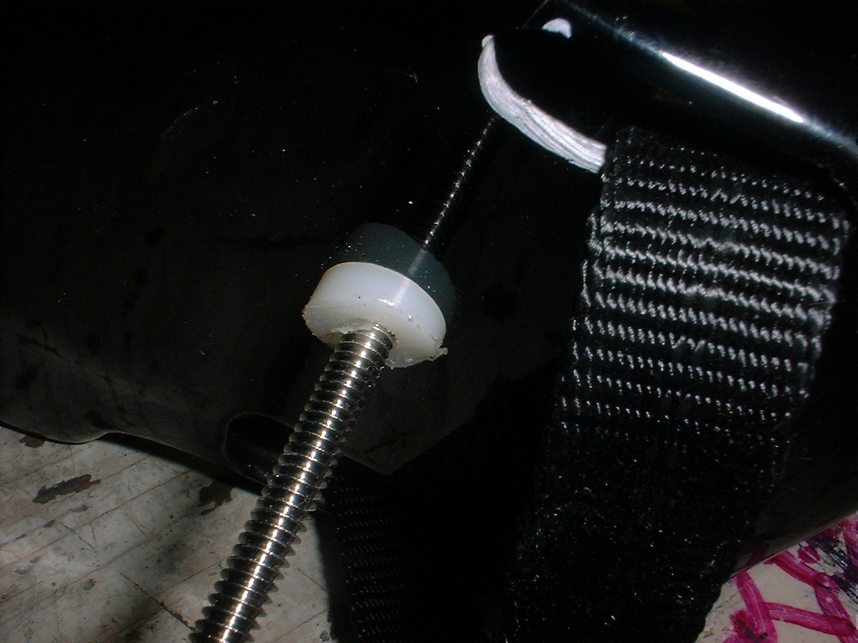 |
I took a couple of lengths of hollow nylon rods and shaped them to provide a proper fit against the helmet. Additionally they assist in keeping the mounting bolt from pushing through the helmet in a crash. |
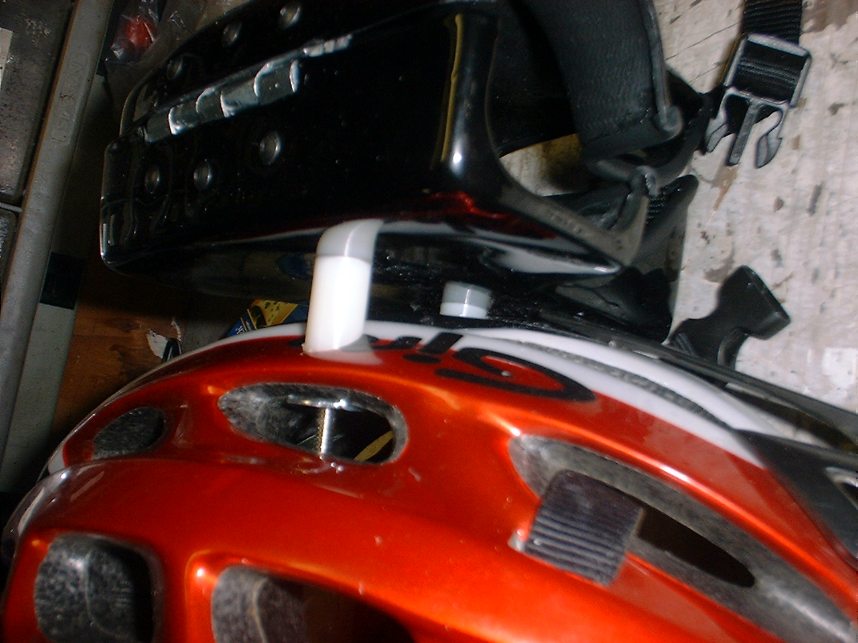 |
Here are the nylon rods after being shaped and installed. These rods also provide the primary horizontal adjustment. Note: The protruding bolt shown here was latter cut flush and a felt pad put over the T-Bolt. | |
 |
A view of the bolts from the inside of the enclosure. I actually made two horizontal slots vice holes to allow for a few degrees of vertical adjustments. These bolts here where also later covered with felt pads. |
 |
You have to counterweight the helmet on the opposite side. I bought a handful of fishing weights and placed them in a couple of Ziplock bags. I used a little over a pound of weights. | |
 |
To add some "aesthetics" to the counter weight, I placed the weights and bag in an old black sock, tied it in a knot and folded it over. |
 |
All that was left to do was zip-tie the counter weight on and it was time to test it out. After a few tweaks it was all good. |
There is real easy trick to determining if you are using the right amount of counterweight. Take your best guess see if it feels right on your head. Then go for a ride. After about 15 minutes of riding you should have a good idea of what to do. If your neck feels fine - You have done it right. If you have an excruciating pain in the left side your neck, add some weight. If the pain is on the right side, take a little out. When setup just right you should be able to ride around for an hour or so without have to give your neck a breather.
One of the upsides to this setup is no wires to fiddle with and stopping at starting the camera is much easier as you do not have to go digging in your pack. Also you do not have to orchestrate putting on your pack and the helmet at the same time. One of the downsides to this setup is that you have a lot of weight up on your head that is sure to give you a sore neck until your neck muscles are built up.
High Definition Camcorder
Update
In early 2007, I switched to a High-Definition Camcorder (HDV), a Canon HV10. It has been quite a learning experience switching to the new format. While the video is incredibly awesome to view if you have an HDTV it is not without drawbacks.
|
Image stabilization with the HDV camcorders just does not seem to be as good as the Standard Definition (SD) systems. The general consensus seems to be that three things are occurring to make image stabilization harder with this generation of HDV and my rig specifically.
|
I have learned to compensate for the stabilization somewhat with my on-bike riding style. Staying off the saddle and being extremely loose with using my body to suck up trail bumps. This style uses more energy and creates leg and arm pump much earlier in the ride.
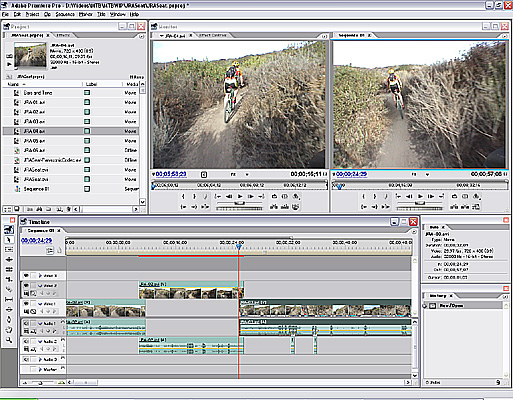
You will need some serious horsepower to edit HDV. A dual core processor running at 3+ GHZ. 2 GHz of RAM, stripped SATA hard drives (At typical HDV project can get upwards to 100GB in size) and at least a 256MB video card. Also you will need software that supports HDV. I use Adobe Premiere Pro 2.0, and will move to 3.0 when it comes out.
Tons of information this stuff is available at DVinfo.net I'll update some more as my adventure HDV continues.
New Helmet Mount Update
I needed to retire the helmet portion of my old helmet cam setup as I had simply worn it out. The adjustment mechanism on the back of the helmet was shot and overall the helmet looked pretty worse for wear. I have been tinkering with a new helmet camera mounting design that would allow me to get away from having a dedicated helmet for the camera system. Wearing the helmet camera on long climbs when you are not filming is a bummer so I would often carry a second helmet. I wanted carry a single helmet and be able to quickly attach or remove the camera gear during the course of a ride. The new setup basically uses the quick-release mounts designed for professional/prosumer grade camera tripods. I find it much more versatile than before.
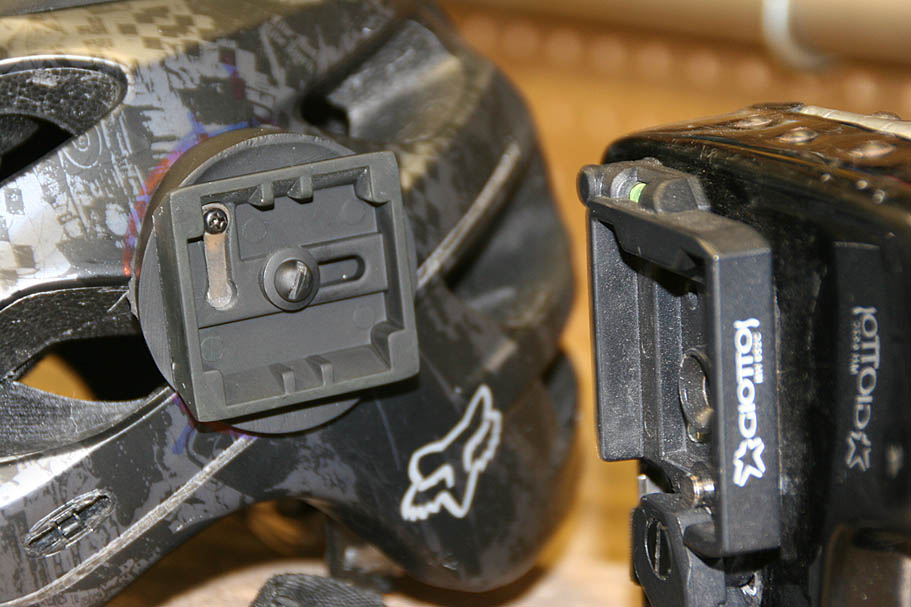 |
Here the main concept piece of the new setup, the quick release mounts. One piece (the plate) is on the helmet, the other (the latch) is on the camera housing. There was two main reasons I put the plate on the helmet vice the camera housing. The first was was because additional plates are inexpensive compared to the latch. The other was the the plates weighed much less than the latch and I was looking to minimize the permanent weight on the helmet. |
 |
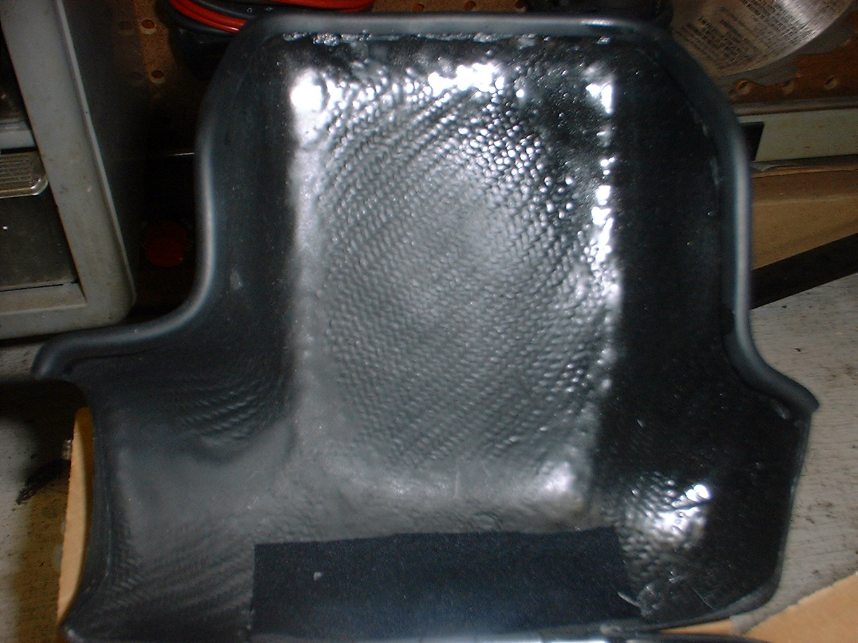
Here is a close up the mounting bracket for the plate. I needed to create a vertical surface for the plate. I ended up mixing up a small batch of fiberglass resin from a small repair kit that you can find at most automotive stores for under $20. I used the cap off of a can of spray paint as my mold and made up two small pucks. Once cured, I used a dremel tool with a sanding attachment to shape the puck until it contoured the side of the helmet and was vertical. I used a 1/4" thick piece of neoprene as a vibration damper/gasket between the bracket and the helmet. |
 |
I used a single bolt through the plate, the bracket and helmet and secured with a recessed T-bolt on the inside of the helmet. I used a neoprene backed washer between the bolt and the plate as an added bit of vibration damping. I found these washers at a screw and bolt speciality surplus store in San Diego (They have like 5,000 of everything). Tightening the screw was enough to hold the camera angle in place but once I had aligned the camera vertically , I drilled a recess in the bracket to allow the small alignment button used on the plate to ensure the plate stayed in alignment. |
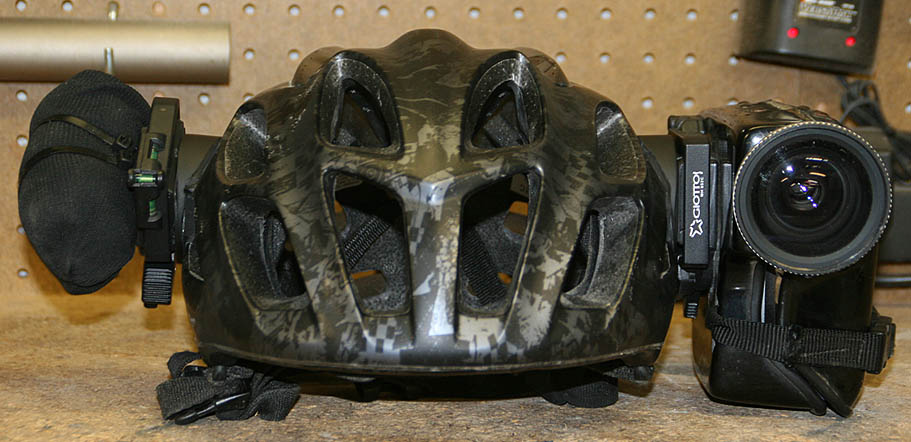 |
Here is everything after the resin brackets were painted and mounted up. You may have noticed that the counterweight bracket is at a different angle than the other side. Since I can now switch the camera housing to the other side, I'm experimenting with some different shooting angles on that side. |
 |
Another thing I like about the setup is I can now move the camera gear from an XC helmet over to my full-face helmet easily. I actually made the full face rig first as it was much simpler. The extra padding of the full face helmet seem to have added a bunch of vibration damping that smoothed out the video some. |
GoPro Camera
I have used a GoPro Hero 2 when they first came out. They were completely substandard to even the standard definition camcorder I had at the time. I currently have a GoPro Hero 3 and a Hero 3+ Black Edition that I have shot footage with. I have not published a video yet shot with GoPro footage. There are a variety of reasons for this but the primary reason is I'm just kinda burnt out on videos and editing the videos does not provide the same kind of creative outlet for me that it used to. Make someday when I crash and break a leg I get back into it. The quality of the Hero 3, 3+ is very good. However, I still feel that the full camcorder offers some advantages over the GoPros. Primary of these is the optics. Bigger Glass - more light and a speck of mud or sweat on the lens is not going to screw up so much of your image like what happens with the tiny lens of the GoPro. The second item is image stabilization. The GoPros do not have image stabilization in the camera like the camcorders do. So far all of the software image stabilization solutions I have seen crop too much of the image down and they produce some distortions that I just don't care for. Will I go back to using a real camcorder? It is highly doubtful that I will as the small size of the GoPros out weight the better quality of the camcorders.
Shoot some video
No matter what method you went with, it is time to go ride and shoot some video. While there are absolutely no rules for what you can do, there are a few guidelines that can help you out.
| Try to have another rider in frame - Having a rider in view while riding along make things more interesting. | |
| Get in some off- bike shots - Ride a head of your buddies and film them coming coming by and going away. Let them know your doing that otherwise they may slow down ask you what is going on which totally ruins the shot. | |
| Find different angles to shoot from - Variety is the spice of life here. |
Get
the video into your computer
Getting the video into your computer depends primarily depends on wither you have an analog or digital camcorder.
For analog camcorders you will need some sort of capture device
When I first started making videos I was using a capture box that plugged into a parallel port made by Dazzle. It allowed me to capture any analog A/V source into a MPEG formatted file with a max resolution of 352 by 240. If you look at Dazzle's product line my gizmo is comparable to the current Digital Video Creator 80 product.
 I
latter upgraded my video card to the ATI All-In-Wonder Radeon 8500DV 64MB
video card that allowed me to capture up to DVD quality video in a variety of
formats. It also has
two integrated firewire ports as well as a bunch of other goodies that is is
useful if you have a MiniDV camcorder.
I
latter upgraded my video card to the ATI All-In-Wonder Radeon 8500DV 64MB
video card that allowed me to capture up to DVD quality video in a variety of
formats. It also has
two integrated firewire ports as well as a bunch of other goodies that is is
useful if you have a MiniDV camcorder.
For digital camcorders all you need is a Firewire card
Digital (Primarily miniDV) camcorders have a Firewire port (Sony calls it iLink, and it is also called a 1394 port) which allows for the digitally recorded video to simply be "transferred" from the camcorder to the computer and saved as an AVI file which you can then edit in your computer. Most editing software includes the ability to pull data off of the digital camcorders
.
Edit your Video
 Once
the video is in the computer I use Adobe Premiere
Pro to do
the editing and exporting. This is where you need to pick out the interesting
stuff and dump the rest of it. This is also where you want to
throw in some transitions, some tunes, a title, and maybe an effect or
two. The general consensus is that five minutes of a lung busting climb is
generally not as interesting as 15 second a technical singletrack
descent. Creativity in trying to capture the essence of the ride is
generally what I shot for.
Once
the video is in the computer I use Adobe Premiere
Pro to do
the editing and exporting. This is where you need to pick out the interesting
stuff and dump the rest of it. This is also where you want to
throw in some transitions, some tunes, a title, and maybe an effect or
two. The general consensus is that five minutes of a lung busting climb is
generally not as interesting as 15 second a technical singletrack
descent. Creativity in trying to capture the essence of the ride is
generally what I shot for.
Adobe Premiere is not cheap and there are many other options. Microsoft Movie Maker 2 is free and while it has no where near the features of Premiere, it will get the job done. If you have an Apple/McIntosh, there is always the Apple iMovie software which is free as well. Ulead Video Studio and Pinnacle Studio are often bundled with capture and video cards which makes them almost free and I hear they are quite adequate.
There are tons of resources and tutorials on the net to assist you in learning how to do desktop video. Here is a good Desktop Video 101 page to get you started.
Publish your
Video
Wither your final video is going to be on tape, CD, DVD, or posted on the web, you have to get your video out of your software and onto so sort of media. There are a thousands of permutations of software and desired export media. If you do a Google search on Exporting Video you will get plenty of good information on the subject. While there are many video formats used on the web, I'm using the Windows Media format (WMV). I used MPEG for a long time, but I like my results with WMV format better. I know you the iPeople (Mac Users) gripe about the WMV format. Just for the record, I got nothing against the Mac crowd, but you represent less than one percent of the operating systems hitting my site. iSuggest you enjoy a cup of iCoffee why you use some iSoftware to convert to whatever iFormat you like. I am going to discuss how I do things with Premiere.
When I am done with my video I usually end up with three copies of the video in different formats.
The video archived back onto the source tape
| |||||||
A high resolution AVI file saved on the computer
| |||||||
A low resolution WMV file used for publishing on the web.
|
So now you have a web-sized version on your video. To get the world to see it you need to post it to a website somewhere.
| OPTION #1 - You can spend some money for a domain name and some web space with an ISP. | |
| OPTION #2 - If you have cable or DSL you could try hosting you own site from you home computer. This is ISP specific. Locally here in Southern California, Cox Cable does not allow it, while Road Runner DSL allows it but provides no support (obviously). | |
| OPTION #3 - You can choose one of the many free web hosting sites out there: I tried a bunch of them and was not happy with any of them when it came to video hosting. Most of them where great for static content like pictures and pages, but when it came to the high bandwidth demands of video they quickly balked. Not to mention most of them will hammer your viewer with pop-ups. | |
| OPTION #4 - You Tube is an okay option. It is a website that makes its money off of people posting and sharing videos. The service is free but all videos are recoded into a flash format that for the most part looks like crap. They also have some file size limits. Once again it is free and not a bad setup. They also allow you to directly link to your video for inclusion into your blog or site. There are ways to link to your original format video once uploaded. Do a google search on it and you'll find the goods | |
| OPTION #5 - If your current ISP provides at least 30MB of web space you could just post it in your personal web space already provided. Of course you will most likely only be able to host one video at a time.. | |
| OPTION #6 - I believe if you are a McIntosh user they have a free movie
hosting service as well, but I have not looked into too much. |
 |
Option #5 would be the easiest but most ISPs do not provide enough personal web with home user accounts. But you might get lucky. |
| Option #4 You Tube is a great way to start out. This has the lowest geek skills requirement. You can later do a free website deal for your static content and point your users to your album. | |
| Option #2 - If you ISP allows it (I should say does not explicitly disallow it), and you have geek skills hosting your videos from home is not a bad way to go. This is a complicated option because it requires you to be a Net Geek. Also viewers can swamp your internet connection if you do not have some bandwidth management software installed on your computer. | |
| If you can afford it, go with option #1. It still requires some geek skills, but most for-cost web space providers offer support. |